Showing posts with label DIY.. Show all posts

Thursday, January 30, 2014

Five on Friday

What a week it has been! Paisley woke up Wednesday morning with 102 temp after having a cold for a week so I decided to take her to the Doctor and after a two hour wait {yes isn't that ridiculous for a baby!?} she was diagnosed with a double ear infection and a respiratory infection. The girl knows how to get sick! Its been a long week inside with a crying baby, but I sure have enjoyed all the cuddling. So for a little fun for this momma lets do some Five on Friday shall we??


ONE
 
Paisley and I joined a Mommy & Me group at our church last week and Im so thrilled for the fun we are going to have. The ladies are all super great and encouraging and I couldn't have picked a better group to join! Cant wait for next week!!


TWO
 
Before Paisley got crazy sick we had a little Valentine craft fun :) She didn't think the paint all over her hands and feet were so great, but I love how it came out. This may just stay up in our house all year long
 
 
THREE
 
I found these bad boys at the store the other day when I was venturing the ice cream, which should never happen again, but these are totally yum! My favorite is the Sea Salt Caramel one, but they are quite delish! Go get some people and don't share!!
 
 
FOUR
 
Alright peeps, who uses these oils? I want the good, the bad and the ugly on these. I need something to boost poor little Paisleys Immune System not to mention finding another healthier approach to get ourselves on the mend. Do you recommend and which ones? Spill all the details :)
 
 
FIVE
 
I saw this on my Instagram feed the other night and just died. Ladies you know what Im talking about....
 
 
Happy Friday! Have a great weekend!


Thursday, January 23, 2014

Five on Friday

So glad its Friday, Friday, Friday!! This is the first time in I dont know how long that Paisley Grace and I have nothing on our agendas! We may just stay inside and rock jammies most of the day since its a wintery day outside! I hope you all have had a great week!


ONE
 
Seriously how cute are these pink furry boots that Paisley got for her birthday?? Im in love. Paisley is in love!
 
 
TWO
 
I found this skirt for Paisley's party a few weeks ago at Abercrombie and Fitch and paid a mere $15 for it! Melt!
 
 
THREE
 
My life before Paisley consisted of coffee. Life while pregnant with Paisley didn't consist so much of coffee, and life after Paisley has really consisted of coffee. Thank you late nights, hungry, teething baby and sleep exhaustion I now run off a cup or two of coffee. Thanks to this handy machine we got with a giftcard my life has forever been changed! I know its no Keurig but it does the same thing as the Keuring and costs half the price! Its a BIG win in the Foltz household!
 
FOUR
 
My mom introduced me to this amazing foundation and its been a serious game changer! Since having Paisley my face has been a complete war zone. Nothing has helped and most foundations have had my face looking even more lowsy and embarrassing until this miracle stuff showed up! Its a new product from Avon and is a light, light mousse and I cannot get enough of this stuff. Its so light you feel like you aren't wearing a darn thing. Go try this now! P.S. Its around $10 :)
 
 
FIVE
 
I should have posted this a few weeks ago, but I am seriously in deep love with my dresser. We bought it off of craigslist for $30 and completely redid it. I had pics of the before but somehow when we backed my phone up they are literally nowhere so just seeing the after will have to suffice. Knobs make me swoon. We found them on Amazon for a great, great deal!


Have a fantastic weekend friends!


Tuesday, January 21, 2014

Tissue Poms DIY


When my mom was here for Paisley's birthday she offered to show me how to make these super easy tissue poms, and let me tell you, they are super easy, super fun to make, and super cheap compared to the $15 Martha Stewart ones that I almost bought from Joann's. We spent a grand total of $10, if that, and made 18 of various sizes and colors. Are you ready for a fun tutorial?

Here's What You Need:


*Colored Tissue Paper of your choice (2-3 packs of each color depending on how many you are wanting)
*Sharp, good pair of scissors
*Pipe Cleaners or Floral Wire

Directions:

1. Take the sheet of colored tissue papers from a pack and fold them in half like a hamburger (long ways)


2. Cut along the folded edge. Make sure that you cut all the paper. When you have bunch of sheets stacked together its hard to sometimes get all the sheets cut. If its easier to unfold and cut along your new crease then that's fine too.


3. When all your sheets are cut, neatly stack them all together making sure that they all line up

4. Fold accordion style. Start folding away from you and then turning over and doing the same thing. It doesn't matter how big or how small you make your folds. Fold all the way to the end. Its better to use 8 sheets per pom but the more sheets you have the fuller it looks and the less sheets you have the more empty and bare it looks, but it is a personal preference. 


5. Cut pipe cleaners in half

6. Fold your folded sheets in half and place a pipe cleaner in the middle of the folded sheets like so and tighten the ends of the pipe cleaners together really tight


7. Cut the ends of all the folded sheets. You can do all at once or half and half. You can either do it rounded or pointed. 


8. Unfold and take one of the half sides and start pulling apart one side and then the other side until the first side is all unfolded. Repeat on the other side. 


9. Fluff out till you get desired results you want


**For multi colored poms when stacking sheets alternate the colors. We did Gold then pink, Gold then pink. we did about 4-5 sheets of each color


Voila you are done! See how easy that was??


Monday, September 9, 2013

How to Make Blog Buttons

Hello Blogger Friends! 

So many of you have asked or were curious how to make your own blog buttons. I wanted to share with you the tutorial that I used to make mine. I am still experimenting and trying to get it all figured out, but for the time being I will include the buttons that I have made so far. They are easy to make, and kind of fun, kind of addicting. I was able to get it on my first try and for someone who doesnt do a whole lot of coding and such this was a big deal! I just followed the steps to a tee and voila, you have a button that you can now swap, or maybe feel more official :) 

Without further ado here is the tutorial that I used: Blog Button Tutorial
Follow the steps for picmonkey and its super simple! 
If you are wanting a white background just save a white background image from google to your computer. Just make sure that it is big enough to do what you are wanting. 
If you have any questions please feel free to email me or comment below so I can help you. I will generally respond later that day :)

Here are the ones I have made so far:

200x200

200x200

150x150

180x180

300x150


There's lots that you can do and lots to experiment with. Am I overly satisfied with what I have made so far? Kinda. Could be better, but its a start at least AND best part about it is that I did it myself!!

I am still figuring out how to include the box code for each button in this post instead of just adding it to the sidebar. I will update as soon as I figure it out ;) OR if one of you passing by reading this knows how, please let me know!

Hope this helps some of you!


Monday, August 26, 2013

DIY Polka-dot Canvas Art

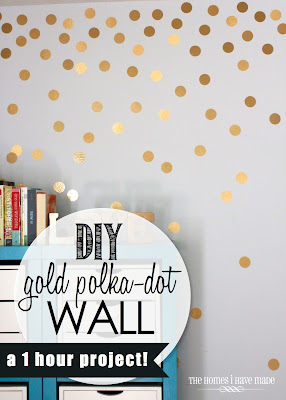
I have this great plan of incorporating polka-dots and chevron {my greatest weaknesses} into our new office and I couldnt be more thrilled or excited. I will be posting the DIY Chevron Canvas Art shortly, but my original plan was to do a dark Navy Blue accent wall with gold metallic polka-dots on the wall like this:


However, my hubby was a little skeptical. Truthfully, I dont blame him. What if it got really messed up and wasnt what I was picturing in my head?? I began searching for chevron projects and while I was in my search I found this:


Easy peasy? Yep! This was the solution to our problem and I would still get something polka-dot!! I set out for Michael's and was on my way to a new project.

What You'll Need: 


1. Decide the size of your canvas' 
{I chose 8X10 and they were on sale for 4.99 for a 2-pack at Michael's!}

2. Pick the color scrapbook paper you are wanting. 
{I chose gold glitter and gold metallic, along with coral glitter and an everything color glitter page} Michael's just so happened to have a sale on paper so they were $1 a piece. How awesome is that for a cheap project??

3. If you are going to paint your canvas, pick your color paint. I chose just a cheap .83 paint that was called "Melon" to go along with the coral color.

4. If you dont have a circle punch then you can buy one. I found the smallest one for $3.99 at Michael's+40% coupon makes for a super cheap circle punch.

5. Strong adhesive or hot glue gun. I used a hot glue gun because, duh hot glue is so much better!

Now for the fun part:

1. Start punching little circles. You will be happy you got this done first. Whilst its easy, its a little time consuming


2. When you are done with all your circles, get your canvas out and now start to arrange the circles how you would like them, UNLESS you are wanting to paint, go a head and paint your canvas first. 

My hubby liked the "not so clean" paint look so I left it unfinished and grungy like. 


3. When you have your circles punched, arranged and just how you like, start gluing or laying them down. I just flipped mine over one by one and put a little hot glue on the back of them and then laid them back in place. Feel free to glue and pick your place as you go, but I just thought I would see what it would look like first, in case I wanted to rearrange or try different things out.


4. This is what the final product looks like when you are finished. You can do as little or as many canvas' as you would like. I chose four but may end up doing more once I can get in the office and start putting it all together. 


Easy right?? 
Took me maybe an hour or two to do it all!

Good luck! 
Would love to see your final product if you decide to give this a whirl :) 

Wednesday, August 21, 2013

Breastfeeding Remedies: All Purpose Nipple Ointment DIY Recipe

I shared a few weeks ago about some issues we are having breastfeeding, and since then its gotten much worse. To say that it has been rough, would only be an understatement. I dont know what is going on with my little punkin, but I am determined to keep at it, no matter how hard and how much I hurt. 

We came home a week and a half ago to a fridge and freezer that had completely stopped working and you can only imagine my reaction when I realized that it had not been running for a while and I had a freezer full of breastmilk. Ya, there were some tears. Many tears, but luckily I researched and researched and my milk wasnt all the way thawed and was able to salvage it. BUT I was beyond worried and terrified of loosing everything that I have been working months on!

With loosing milk and a decreased supply due to darn Aunt Flo, it pretty much sent me into a stressed out, hot mess this last week. And with a teething baby {well, assuming} since she is pulling my nipples like none other, I have been in some bad shape, and the cream I had just wasnt doing the trick. I mean, this has been the worst its ever been. Blood, cuts, soreness, tears, excruciating pain, you name it. Paisley is so easily distractable right now that she is on and off, on and off, pulling, jerking, and yes, I have tried many times to break her suction before she can turn her head and pull right off, but sometimes there is no fair warning for when she is gonna go for it. I've tried a nipple shield and Paisley refuses to eat with it. We started out with a shield and then weaned off of it and since then, Paisley wont have anything to do with it. Sad I know, for this moment anyway. 

Till yesterday, I have manned up to the pain and gotten through it, but its gotten worse and I about had it yesterday morning so I began to do some research. Research at 4:30 am because I was in that much pain ya'll. Her latch is great, it hasnt changed, but for some reason the last week or so, all she does is pull, pull, pull. I have tried popping her every time she pulls, but she thinks its funny when I do it, and when I yell "no" she does it even harder. When I take her off and let her have a break, she screams. Its a never ending battle. A LC call just might be in our near future, but for now I have found a remedy thanks to my very early morning research.

From several online forums and google searches for "All Purpose Nipple Ointment Recipes" I have combined a few DIY recipes to replace the prescription $85 Dr. Jack Newmans All Purpose Nipple Ointment. Seriously $85 for a prescription ointment for your nipples? You have got to be joking me!! $85 + a trip to the dr to even get a prescription or a DIY $20 ointment. You pick my friends. 

I headed straight for the store yesterday morning and picked up a few things to make this concoction for sore, dry, cracked, cut, bleeding, stinging nipples. Let me just say this, once I finally got it mixed together it was instant relief and this morning I dont feel near as bad as I did yesterday. Its healing. Quickly. Can I get an amen??

I mixed equal parts of the following: {About a teaspoon of each}


*It was recommended that the Polysporin be the real deal, and the rest can be a generic brand.*

Use after each feeding

This stuff is pure bliss. I promise it works fast and will make you feel a 100 times better than you felt before you started using it. Something about using a antibiotic cream and an anti-fungal cream really helps clear up everything super duper fast. Normally I use Boob Ease Natural Nipple Balm because its organic and doesnt have lanolin or junk in it, but this time around it just wasnt cutting it for me, but I do highly recommend this stuff just for normal wear and tear of breastfeeding.

Oh the aches and pains of breastfeeding. If its not one thing for us its the other when it comes to breastfeeding, but I honestly wouldnt have it any other way. I hope this post helps someone who has been in this situation or needs a little help.


Happy Breastfeeding Momma's!
**I was not sponsored for these products. All opinions are simply my own.

Friday, December 21, 2012

Project for Paisley Grace

Ok, so I always dreamed of having a little girl and the fun outfits she would have, all the shopping we would do, all the pink she would have, how cute she would be, and all the fashionable accessories she would own and wear, and my days of dreaming are finally becoming reality!

Nothing has really changed much :)

We get to have a little girl, she has a cute name, Paisley Grace, she has a closet full of pink, ha, her room is gray and pink, she has pink accessories to go in her carseat, cute little shoes (never thought my baby would have so many pairs of boots), and she has tons of cute little fashion accessories. Im obsessed just a bit if you couldnt tell.

So, between Walmart and Target, I have bought all the headbands that they currently offer, go figure, have found headbands here and there, ordered a few from etsy, got a few from Burlington, and I have found my newest hobby....MAKING headbands for Paisley. I might just say, that they are cheap and easy to make, and so much fun!! I spent the afternoon yesterday making a few for Paisley and what fun did I have! I found most of my stuff at Michaels, but I am sure that Joanns has quite a collection, not to mention you may be able to order stuff online too. Paisley is going to be so spoiled!!

I wanted to share what I made and let you all in on the excitement! Here's what I have so far:


I bought a pink feather and then the pink barrette piece and glued them together. Easy as cake!


The peacock feather piece is my favorite. Every girl needs some sort of glam :)


The gray and pink headbands are made of felt. Felt is like .10 a piece or our Michaels does 4/$1 quite often so I bought a bunch. I found a tutorial on making headbands and she gave instructions to make the flowers below and they were easy!! I added the little flowers in center, but you could add anything from pearls, to sparklies or whatever suits your fancy. Takes lots of hot glue though.


Here is the link below that I used to make these headbands and as a guideline for the ones above:

http://fabulesslyfrugal.com/2012/06/baby-headbands-tutorial-for-3-headbands.html

Little girls are so fun! It will be even more exciting when Paisley gets here! I cant imagine all the fun that we are going to have :)

Tuesday, November 13, 2012

Handy Men

Originally when we started trying to figure out a baby nursery, I knew that I wasnt going to just settle for any kind of changing table, but instead it had to be a dresser and it had to be redone. I mean what fun is it to buy it already done? I wanted something that had our own personal touch to it, and nonetheless, was cheap! When we found out it was a girl, I knew I wanted something vintage and I wanted it white. I spent weeks looking and checking craigslist for deals and trying to find the "perfect" dresser, and after much looking, email and calling we found one that was a bit out of our way but cheap. $40. What a steal! It was exactly what I was looking for, vintage, bit warped with time. It was already white, but to me it looked like we just needed to change the knobs and patch up a few places with white, but was I ever wrong.

Aaron spent many hours sanding and stripping paint, only to discover that there were six layers of paint on the thing. Im sure he was regretting getting into some kind of project like this :) Aaron worked hard, and since we are so busy my father-in-law took over for us and finished :)

Now that its all complete I could not be anymore impressed. I am in love. It might be a bit on the smaller side, but it came out exactly like I had pictured!! Thank you Husband and Papa Tim!!


Before
I have to admit seeing the before and after pictures, I didnt think we had a lot of work at first, but now I realize what had to go into it. It was a bit beat up if I was being honest :)


After
Absolutely love the clear glass knobs and we cleaned the original brass keyholes and placed them back on!